Introduction to Garlic Bread Rolls
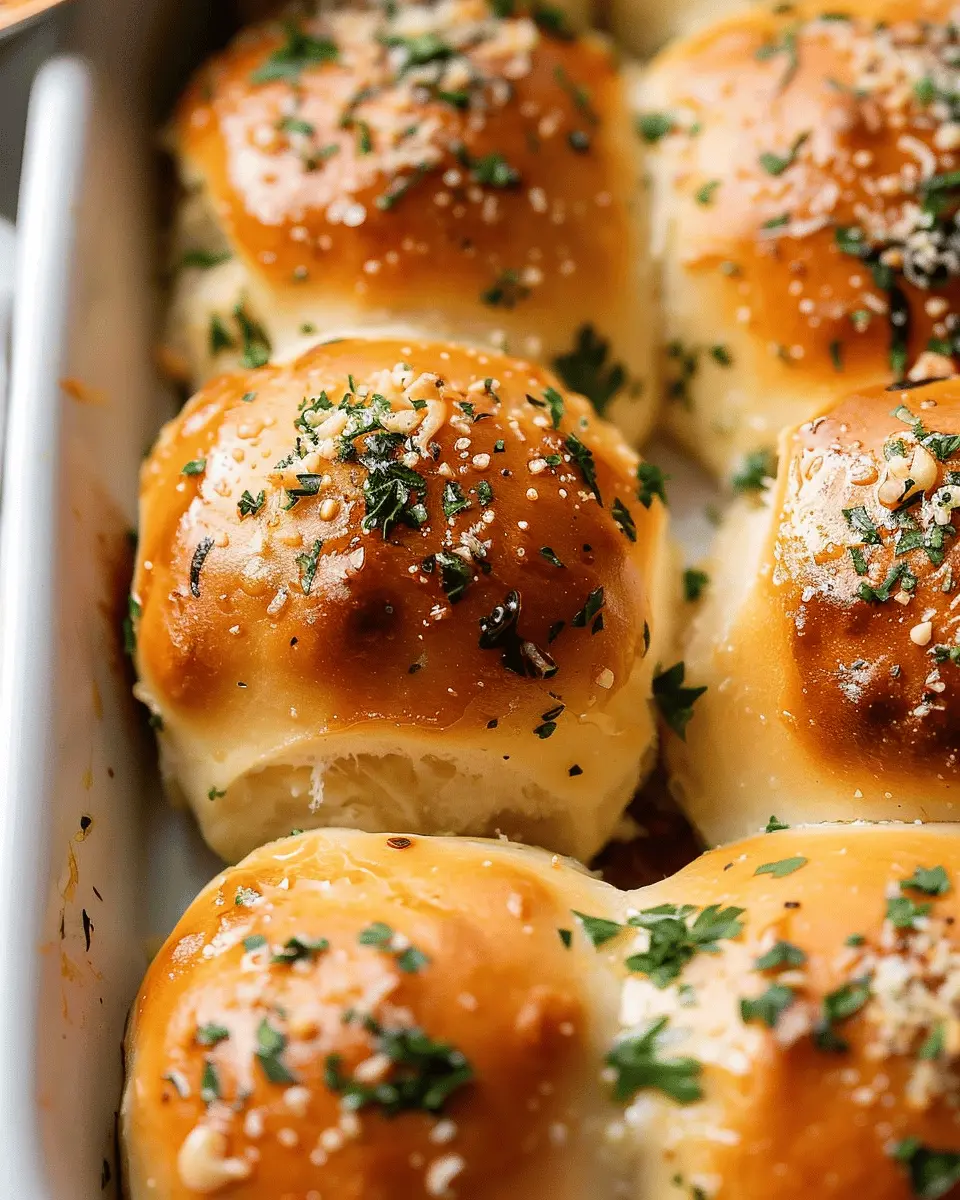
When it comes to culinary delights, garlic bread rolls effortlessly bridge the gap between comfort food and gourmet experience. These delightful bites offer a warm, buttery embrace infused with the rich aroma of garlic, making them the perfect accompaniment to just about any meal. Whether you’re winding down after a long day at work or hosting a casual get-together with friends, these rolls are sure to impress.
Why Garlic Bread Rolls are a Must-Try for Young Professionals
As a young professional, your time is valuable, but that doesn’t mean you should compromise on flavor or satisfaction. These garlic bread rolls not only deliver on taste but are also incredibly simple to whip up. Imagine coming home to a house that smells like a charming Italian bistro—talk about an instant mood booster! The great thing about these rolls is their versatility. You can enjoy them alongside a hearty soup, a crisp salad, or even as a snack all on their own.
But let’s get down to the perks:
- Quick and Easy: With minimal ingredients and steps, you can have freshly baked garlic bread rolls ready in under an hour. Perfect for busy weeknights!
- Budget-Friendly: Ingredients like flour, butter, and garlic are some of the most affordable staples out there. You don’t need to break the bank to enjoy a delicious treat.
- Impress Guests: If you’re inviting friends over, serving warm garlic rolls will wow them—and they’ll think you’ve spent hours in the kitchen. It’s a win-win!
A recent survey by the National Restaurant Association found that bread products, especially those infused with flavors like garlic, are trending in culinary preferences. Why not join this revolution at home? Whether you’re opting for the classic version or experimenting by adding herbs or cheese, your palate will thank you.
So, are you ready to take your dining experience up a notch? Grab your apron and let’s dive into crafting these irresistible garlic bread rolls that promise to become a staple in your kitchen! For more baking tips and recipes, check out resources like The Kitchn or Serious Eats.
Ingredients for Garlic Bread Rolls
Making garlic bread rolls is a delightful way to elevate any meal. The aromatic combination of garlic, butter, and freshly baked bread creates an irresistible treat that many people enjoy. Let’s dive into the ingredients you’ll need to whip up these delicious rolls.
Essential Ingredients
- All-purpose flour: About 4 cups will give your rolls that chewy texture we all love.
- Active dry yeast: You’ll need 2 teaspoons to help your dough rise beautifully.
- Warm water: Approximately 1 ½ cups mixed with the yeast will kick-start the fermentation process.
- Unsalted butter: ½ cup, melted. This is key to achieving a rich, buttery flavor.
- Garlic: Freshly minced—about 4-5 cloves will give your rolls that garlic punch.
- Parsley: Chopped fresh parsley adds a bright touch to your rolls.
- Salt: 2 teaspoons for flavor in the dough and the garlic butter topping.
Optional Ingredients
- Italian seasoning: A teaspoon or two if you want to jazz it up a bit.
- Parmesan cheese: Grated on top for added taste.
Cooking Tip
Make sure your ingredients are at room temperature for the best results! Curious about techniques to amplify the flavors in your garlic bread rolls? Check out this article on maximizing flavor in baking. Mixing up your ingredients can lead to endless variations and a new favorite recipe!
Step-by-Step Preparation of Garlic Bread Rolls
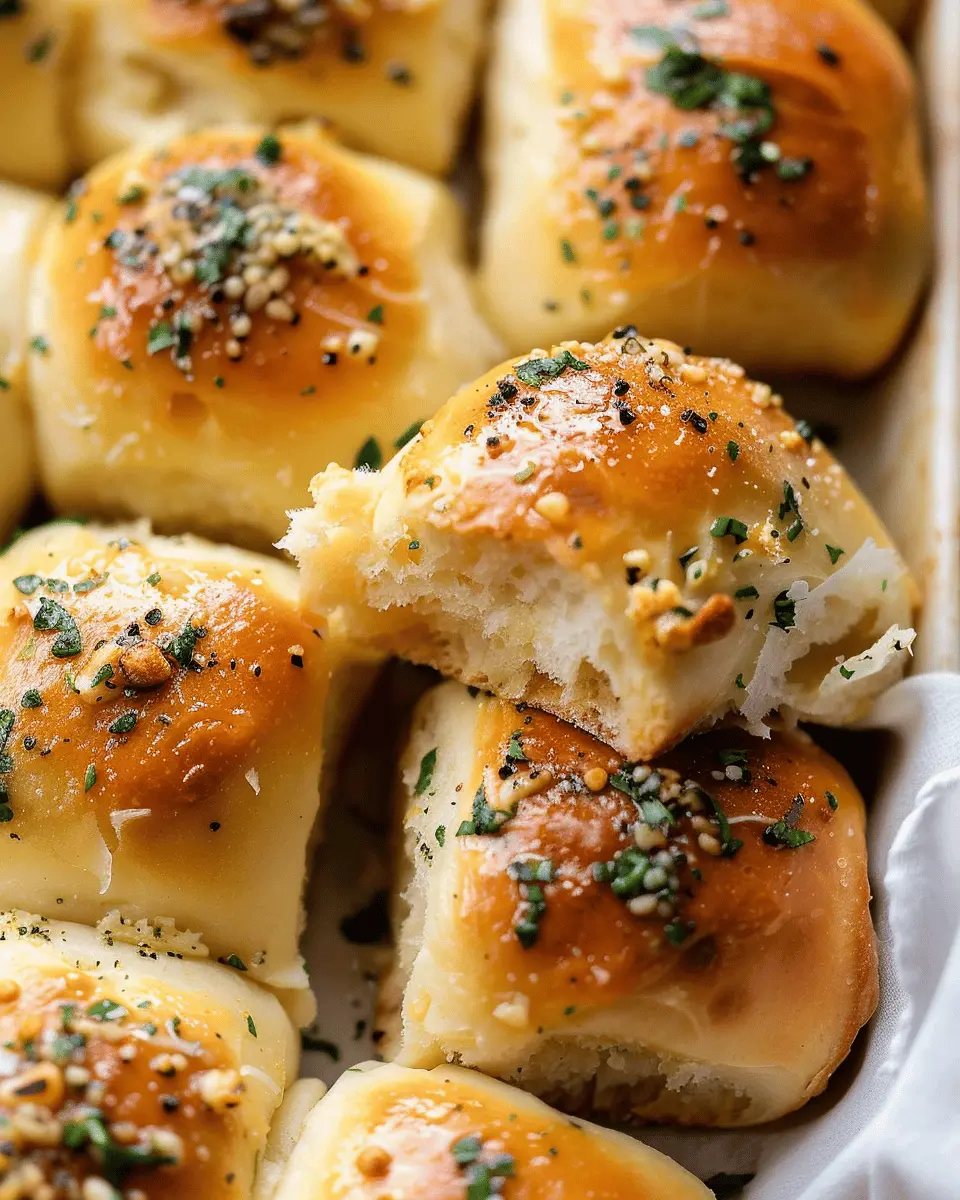
Garlic bread rolls are the perfect combination of soft, buttery goodness, and the rich aroma of garlic. Whether you’re pairing them with pasta or just enjoying them on their own, these rolls are sure to delight! Let’s dive into the step-by-step preparation of garlic bread rolls so you can impress your friends and family with minimal effort.
Gather Your Ingredients
Before any cooking adventure, it’s essential to have all your ingredients on hand. For garlic bread rolls, you will need:
- 4 cups all-purpose flour
- 1 packet (2 ¼ teaspoons) instant yeast
- 1 cup warm water (around 110°F)
- 1 tablespoon sugar
- 2 teaspoons salt
- 6 tablespoons unsalted butter, softened
- 6 cloves of garlic, minced
- Fresh parsley, chopped (for garnish)
- Optional: 1 egg (for egg wash)
Having everything ready will help the process flow smoothly, so take a minute to grab your ingredients and tools.
Preparing the Garlic Butter
Garlic butter is the star of this recipe, and preparing it is quick and simple. In a bowl, combine softened butter with the minced garlic and a pinch of salt. Use a spatula or a fork to thoroughly mix these ingredients until you have a creamy, garlicky spread. Your kitchen will start to smell fantastic—trust me!
Mixing the Dough
In a large mixing bowl, dissolve the sugar in warm water, then sprinkle in the instant yeast. Let it sit for about 5–10 minutes until it’s frothy. This is where the magic begins! Next, add in 2 tablespoons of garlic butter and the salt. Gradually mix in the flour, one cup at a time, until you form a sticky dough.
Kneading to Perfection
Transfer your dough to a floured surface, and let’s get your hands a bit messy! Knead the dough for about 8-10 minutes until it becomes smooth and elastic. If you’re new to kneading, don’t worry! Just fold the dough over, push it down with the heel of your hand, and repeat. You can think of this as a mini workout session!
Shaping the Rolls
Once you’ve kneaded the dough, let’s shape those adorable rolls. Pinch off small pieces (about the size of a golf ball) and roll them into smooth balls. Place each roll onto a baking sheet lined with parchment paper, leaving a little space between them so they can rise.
The First Rise
Cover the rolls with a clean kitchen towel and let them rise in a warm area for about 1 hour or until doubled in size. This is a great time to clean up your kitchen or plan your dinner menu!
Preheating the Oven
While waiting for the dough to rise, go ahead and preheat your oven to 375°F (190°C). A properly heated oven is crucial for achieving those fluffy, golden-brown rolls you dream of.
Egg Wash and Baking
If you want a beautiful, glossy finish on your garlic bread rolls, whip an egg and brush a thin layer over each roll. This step is optional, but it does add a nice touch! Bake the rolls for about 20 minutes or until they’re golden brown and cooked through.
Making the Final Garlic Butter
While the rolls are baking, mix up the remaining garlic butter to brush on top once they come out of the oven. This adds an extra layer of deliciousness! Just combine the remaining garlic butter with a bit of chopped parsley for that vibrant green touch.
Enjoying Fresh Garlic Bread Rolls
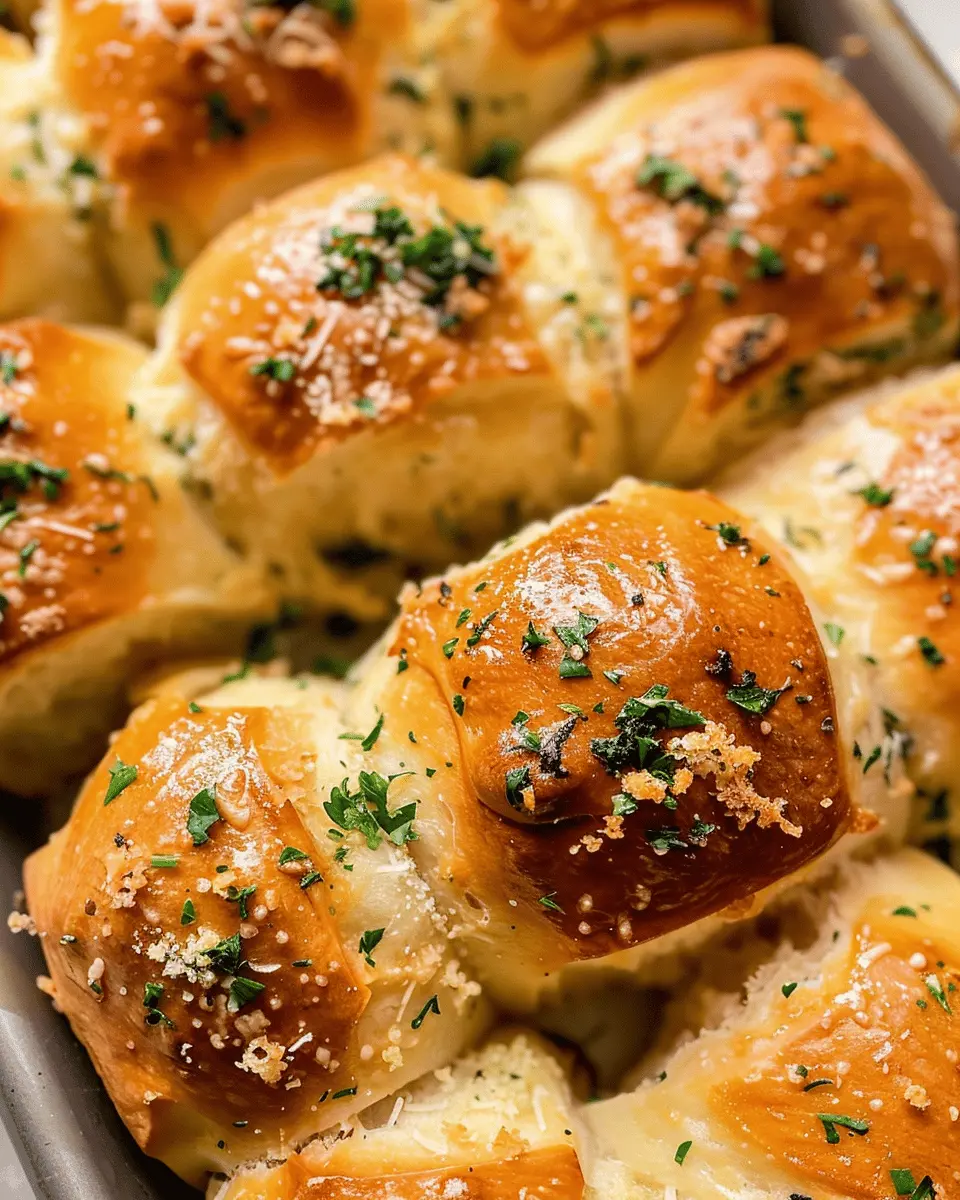
Once your rolls are out of the oven, brush them generously with your freshly made garlic butter. The aroma will be irresistible! Serve them warm and watch them disappear in minutes.
Feel free to experiment with different herbs or add cheese inside for a garlic bread roll twist. These rolls are not just a side dish; they are a culinary experience waiting to happen! Enjoy your delicious creation!

Variations on Garlic Bread Rolls
When it comes to garlic bread rolls, the classic version is just the tip of the iceberg. Let’s explore some creative variations that can spice up your kitchen game and impress your friends at your next dinner party.
Cheesy Garlic Bread Rolls
Who doesn’t love a bit of cheese? Add a delightful twist to your garlic bread rolls by incorporating cheese right into the dough or as a gooey filling. Try using:
- Mozzarella for that melty goodness
- Parmesan for a savory bite
- Cheddar for a rich flavor
To achieve that perfect stretch, you can even sprinkle shredded cheese on top before baking. The result? A cheesy, garlicky delight that will have everyone coming back for seconds.
Herb-Infused Garlic Bread Rolls
Elevate your garlic bread rolls by indulging in a medley of fresh herbs. Think rosemary, thyme, or even parsley. These herbs can brighten up the rolls and add freshness that complements the garlic perfectly. Simply mix finely chopped herbs into your garlic butter before slathering it on your rolls.
Not only does this variation add beautiful color and aroma, but it’s also a great way to get more antioxidants into your diet. Feel free to check out the benefits of fresh herbs on sites like Healthline for more inspiration!
Spicy Garlic Bread Rolls
Looking to add some heat? Transform your garlic bread rolls into a spicy sensation by adding a kick. Here’s how:
- Mix in red pepper flakes or diced jalapeños for that fiery touch.
- Consider a drizzle of sriracha or a dash of hot sauce in your garlic butter.
This mouthwatering variation is perfect if you enjoy bold flavors and want to tantalize your taste buds with a unique twist.
With these variations of garlic bread rolls, you’ll never run out of delicious options to try. Happy baking!
Cooking Tips and Notes for Garlic Bread Rolls
Common Mistakes to Avoid
When making garlic bread rolls, there are a few pitfalls to watch out for. Firstly, don’t rush the rising time; allowing your dough to double in size develops the flavor. Another common mistake is using too much garlic. While garlic is the star of the show, balance is key—overdoing it can be overwhelming. Additionally, remember to mix your butter with fresh herbs or spices for an extra kick. Did you know that incorporating a pinch of salt can enhance the overall flavor too? An expert tip: if you’re unsure if your rolls are ready to bake, a quick poke test can help. If the dough springs back slowly, it’s time to pop them in the oven!
Storing Leftover Rolls
If you end up with some delicious garlic bread rolls leftover (though, let’s be honest, that’s unlikely!), storing them properly is essential. Wrap the rolls in foil or plastic wrap to preserve their freshness, and place them in an airtight container. They can be stored at room temperature for up to two days. For longer storage, consider freezing them; they’ll hold their quality for about a month! When you’re ready to enjoy them again, just reheat in the oven for that fresh-baked taste.
By keeping these tips in mind, you’re not just making garlic bread rolls; you’re crafting delicious memories to share around the table! For more insights on bread making, check out King Arthur Baking’s tips for even further enhancement of your baking skills.
Serving Suggestions for Garlic Bread Rolls
Pairing with Soups and Salads
Garlic bread rolls are the ultimate companion to your favorite soups and salads. Imagine sinking your teeth into a warm, buttery roll while enjoying a comforting bowl of creamy tomato soup or a crisp garden salad. The delightful garlicky goodness enhances flavors without overshadowing them.
- Try with:
- Creamy Mushroom Soup
- Classic Caesar Salad
- Chunky Vegetable Chili
Fun fact: According to a study by The Flavor Institute, combining garlic with tomatoes not only heightens flavor but can boost health benefits too!
Perfect for Dipping
Another way to savor these delicious rolls is by using them for dipping. Their soft texture makes them perfect for scooping up that last bit of sauce or dip. Whether you have a rich marinara or a cheesy spinach dip, garlic bread rolls are ready to soak it all in.
Consider serving them with:
- Marinara sauce for a classic Italian twist
- Spinach and artichoke dip for a creamy indulgence
- Olive oil infused with herbs for a Mediterranean touch
You’ll find that these rolls elevate any gathering—whether it’s a casual dinner or a lively weekend party. Want to impress your guests? Bake a batch of these rolls and have them paired with your favorite dishes to create a dining experience that’s simply unforgettable.
Time Breakdown for Making Garlic Bread Rolls
Creating delicious garlic bread rolls is an enjoyable process, and understanding the time required can help you plan better. Here’s a quick breakdown of the time involved:
Preparation Time
You’ll spend about 20 minutes prepping the dough and garlic mixture. It’s all about mixing, kneading, and letting those beautiful ingredients come together!
Rising Time
Give the dough a chance to thrive with approximately 1 hour of rising. This step allows the rolls to become fluffy and airy, making every bite delightful.
Baking Time
Once risen, pop them in the oven for about 15-20 minutes. The aroma of baking garlic bread rolls is sure to make your mouth water!
Total Time
In total, expect to dedicate 1 hour and 40 minutes from start to finish. It’s well worth it for such a tasty treat!
For more tips on perfecting your rolls, check out the Taste of Home’s guide on bread-making techniques. Remember, the heart of any great roll is patience and love!
Nutritional Facts for Garlic Bread Rolls
When indulging in garlic bread rolls, it’s good to know what you’re savoring! Here’s a quick breakdown of their nutritional content to keep you informed about your tasty treat.
Calories
On average, each garlic bread roll contains approximately 150 calories. This makes them a delightful side without going overboard on your calorie count, allowing you to enjoy them with various meals.
Carbohydrates
These rolls are primarily made up of carbohydrates, clocking in around 25 grams per roll. Carbs provide the necessary energy you need throughout the day, making them a handy snack for busy professionals.
Fats
When it comes to fats, you can expect about 5 grams per roll, primarily from butter and any additional oils. This little bit of richness adds to the flavor, but moderation is key. For a healthier spin, consider using olive oil or a light spread for a nutritious twist.
For more detailed nutritional information, you can check out resources such as USDA FoodData Central or Healthline. Enjoy your garlic bread rolls along with a fresh salad or a light soup for a wholesome meal!
FAQs about Garlic Bread Rolls
Can I make garlic bread rolls ahead of time?
Absolutely! Preparing garlic bread rolls in advance can be a lifesaver, especially if you’re planning for a busy week or a gathering. You can make the dough and let it rise, then shape the rolls and store them in the fridge overnight. Just remember to cover them well with plastic wrap to prevent drying out. The next day, let them come to room temperature before baking, and you’ll have warm, fresh rolls with minimal effort!
What can I use instead of instant yeast?
If you find yourself out of instant yeast, don’t worry! You can substitute with active dry yeast; just remember to activate it in warm water for about 5-10 minutes before mixing it into your dough. Alternatively, for a healthier twist, you can use sourdough starter, although it will change the flavor slightly.
Can I freeze garlic bread rolls?
Yes, you can definitely freeze garlic bread rolls! After baking, allow them to cool completely, then wrap each roll in plastic wrap followed by aluminum foil to prevent freezer burn. When you’re ready to enjoy, simply reheat them directly from the freezer in a preheated oven at about 350°F (175°C) for 10-15 minutes. This method helps retain their delicious flavor and texture.
Embrace the convenience of meal prep and enjoy those garlic bread rolls whenever you crave them! For more tips on storing bread, check out King Arthur Baking’s guide on preserving baked goods.
Conclusion on Garlic Bread Rolls
Final Thoughts on Garlic Bread Rolls
If you’re looking to elevate your meals, these garlic bread rolls are a must-try! They are more than just a side—they’re a delightful addition that enhances any dish. Whether paired with a hearty soup or enjoyed alone, their irresistible aroma and flavor will impress your taste buds. And don’t be intimidated; making your own bread rolls can be simpler than you think!
I encourage you to experiment with this recipe and make it your own. Feel free to add your twist with herbs or cheeses. For more inspiration, check out Serious Eats for innovative ideas. Happy baking!
PrintGarlic Bread Rolls: The Best Homemade Treat for Any Meal
These garlic bread rolls are the perfect combination of soft, fluffy bread with a rich garlic butter flavor, making them an ideal side for any meal.
- Prep Time: 15 minutes
- Cook Time: 20 minutes
- Total Time: 1 hour 35 minutes
- Yield: 12 rolls 1x
- Category: Bread
- Method: Baking
- Cuisine: Italian
- Diet: Vegetarian
Ingredients
- 4 cups all-purpose flour
- 2 teaspoons instant yeast
- 1 teaspoon salt
- 1 tablespoon sugar
- 1 cup warm water
- ½ cup unsalted butter, melted
- 4 cloves garlic, minced
- ¼ cup fresh parsley, chopped
Instructions
- In a large bowl, combine the flour, yeast, salt, and sugar.
- Add warm water and mix until a dough forms.
- Knead the dough for about 10 minutes until smooth and elastic.
- Cover and let it rise for 1 hour, or until doubled in size.
- Meanwhile, mix melted butter, garlic, and parsley in a small bowl.
- Preheat the oven to 375°F (190°C).
- Punch down the dough and shape it into rolls.
- Place rolls on a baking sheet and brush with garlic butter.
- Bake for 20 minutes or until golden brown.
- Serve warm.
Notes
- For best results, use fresh garlic instead of garlic powder.
- Experiment with adding cheese to the rolls before baking for a cheesy garlic bread experience!
Nutrition
- Serving Size: 1 roll
- Calories: 150
- Sugar: 1g
- Sodium: 200mg
- Fat: 7g
- Saturated Fat: 4g
- Unsaturated Fat: 2g
- Trans Fat: 0g
- Carbohydrates: 19g
- Fiber: 1g
- Protein: 3g
- Cholesterol: 15mg
Keywords: Garlic Bread Rolls