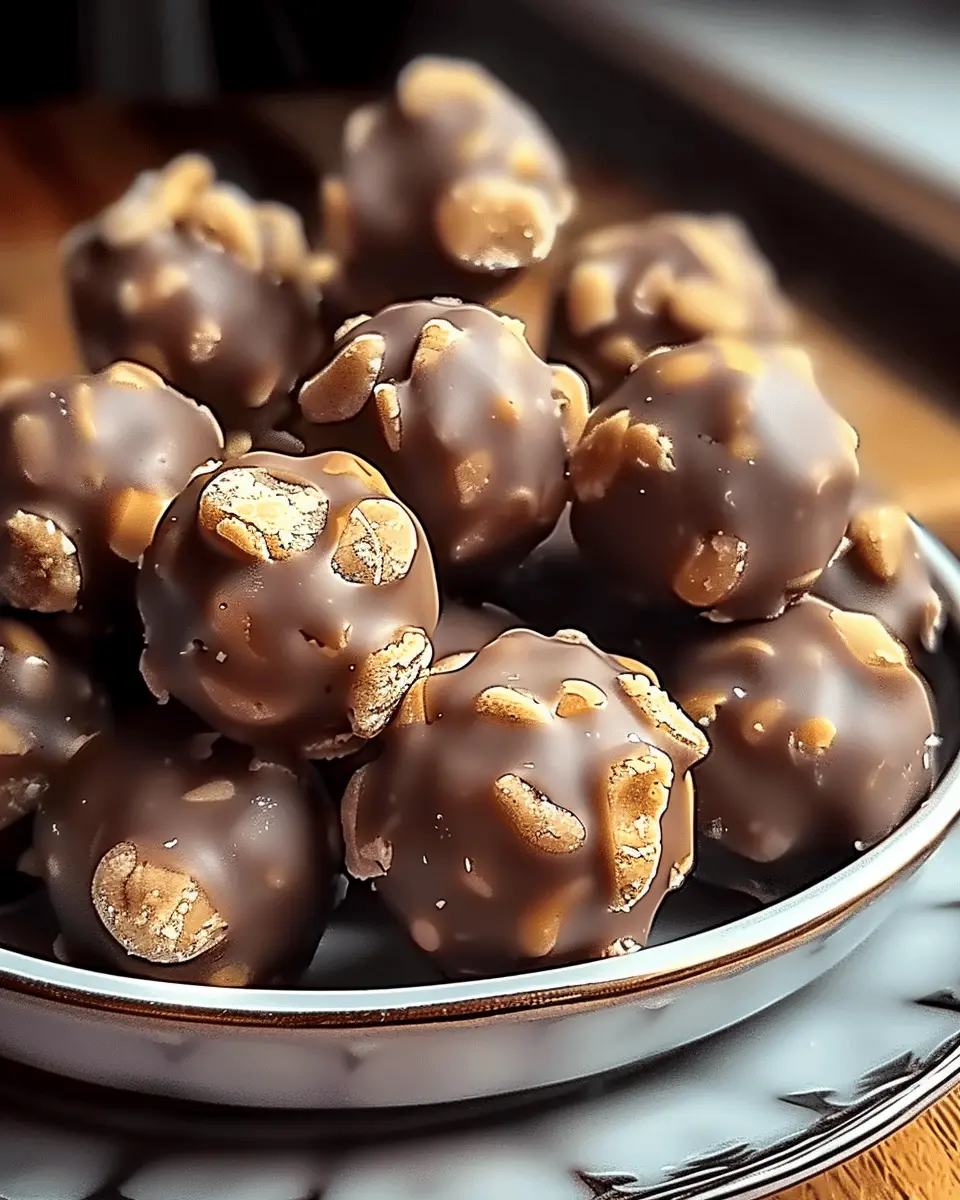
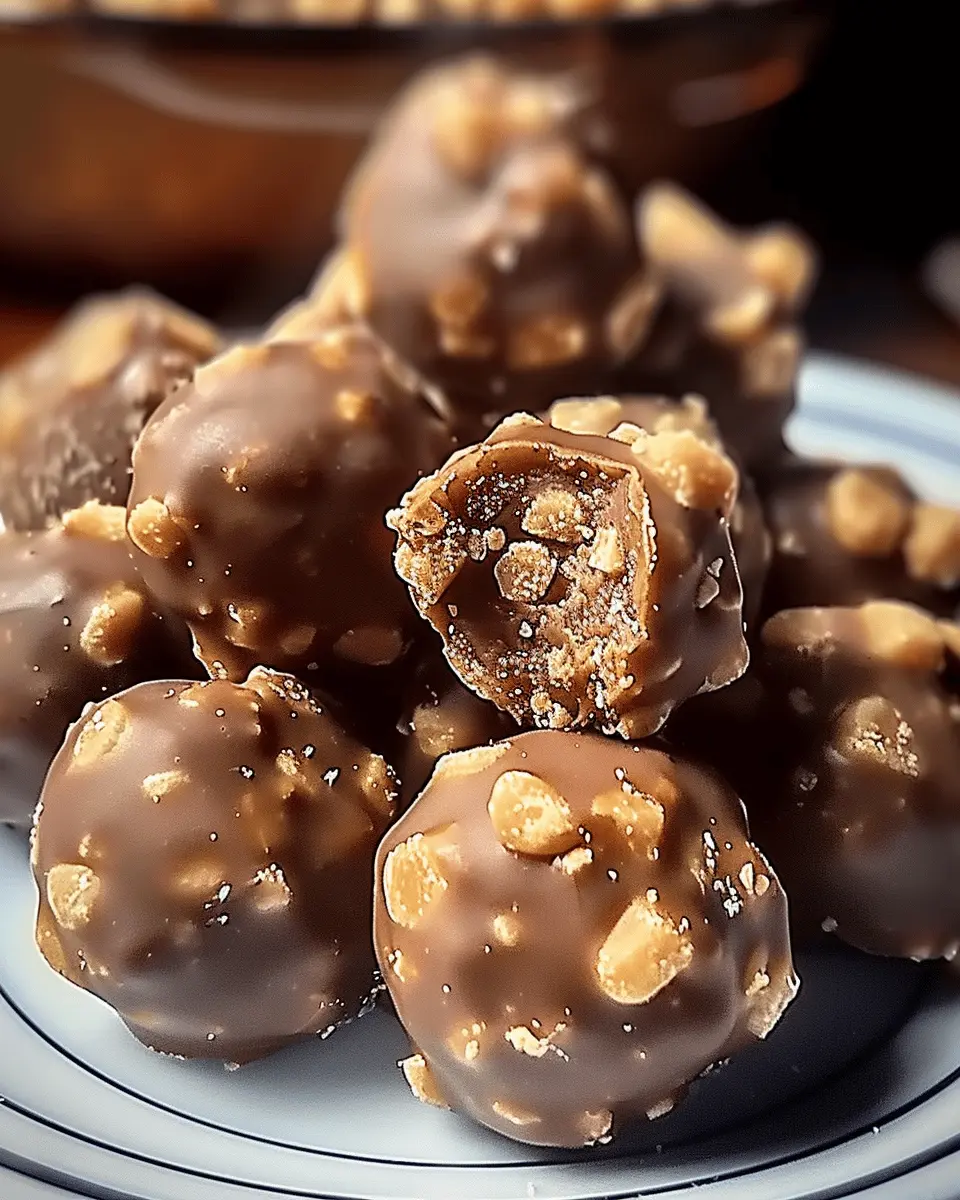
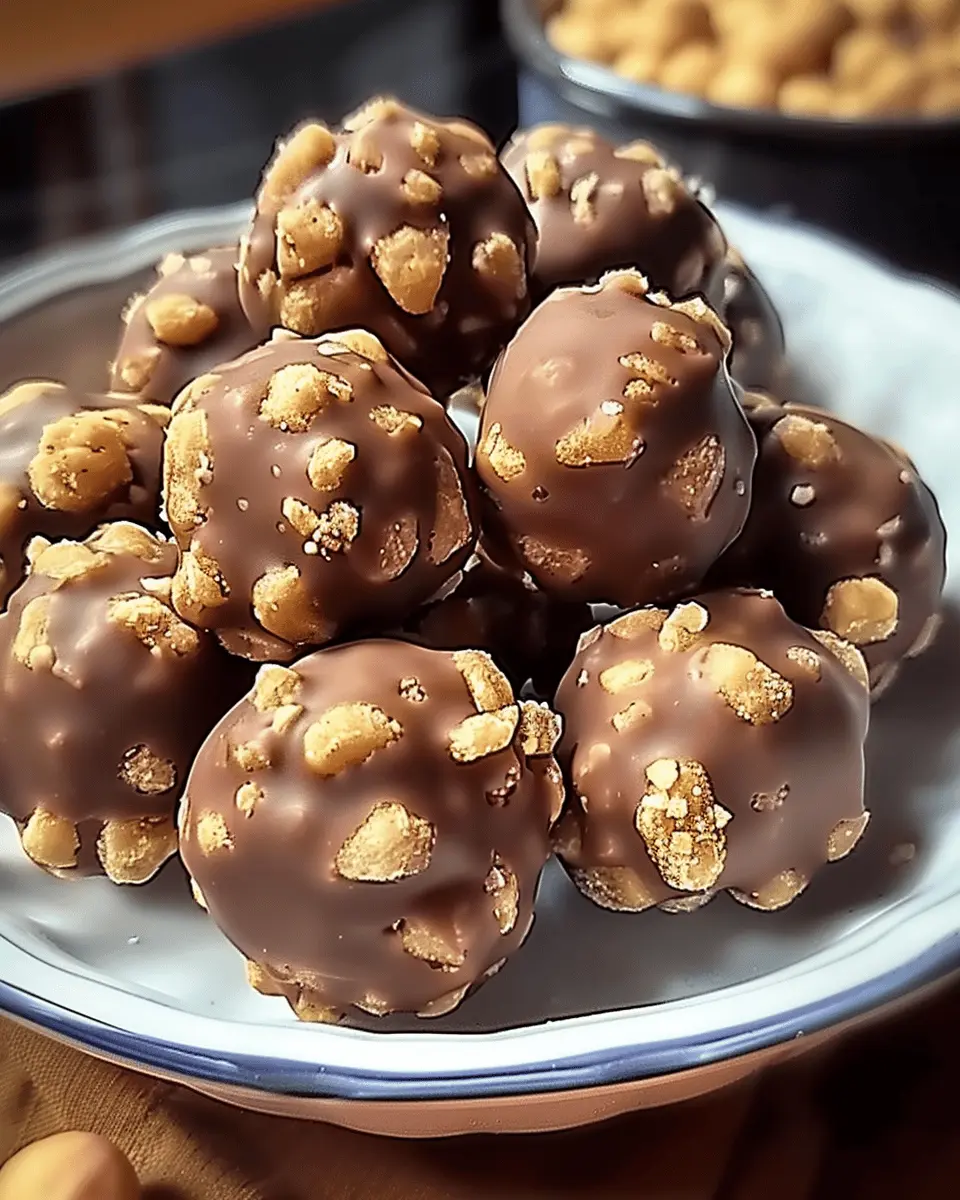
Introduction to Butterfinger Balls Recipe
The joy of homemade treats
There’s something special about whipping up a delicious homemade treat in your kitchen. Whether it’s a cozy night in or a gathering with friends, making your own goodies allows you to infuse your personality and creativity into every bite. One such delightful creation that will leave everyone wanting more is the Butterfinger balls recipe. These no-bake treats are easy to make and look impressive when served. Plus, they require minimal ingredients, which means you can whip them up without the fuss.
Many of us have fond memories of enjoying Butterfinger candy bars—so why not recreate that iconic flavor in ball form? Making your own treats can be an invigorating experience, inviting both nostalgia and conversation as you share these delicacies with others. And let’s be honest: who doesn’t appreciate a thoughtfully made snack?
Why Butterfinger balls are a crowd-pleaser
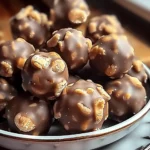
When it comes to desserts, few can compete with the sweet and crunchy combo found in Butterfinger balls. Inspired by the classic candy bar, this treat is beloved for its unique texture and rich flavor. The creamy peanut butter base, combined with crushed Butterfinger candies and coated in chocolate, makes for a winning combination that satisfies every sweet tooth.
You might be wondering, “How can I make these irresistible treats my own?” The beauty of this Butterfinger balls recipe is in its versatility. You can easily tweak it by adding your favorite toppings or dipping the balls in different types of chocolate. Consider sprinkling crushed nuts or even drizzling caramel on top for an added wow-factor!
Statistics reveal that homemade treats significantly enhance bonding among friends and family (check out the article here), making these Butterfinger balls an excellent way to create cherished memories. So why not gather your loved ones and turn these delightful bites into a shared experience? You’ll discover that food truly has the power to connect us all.
As we delve into the Butterfinger balls recipe, prepare to embark on a sweet adventure that promises joy, flavor, and plenty of smiles all around!
Ingredients for Butterfinger Balls
Essential Ingredients
Creating Butterfinger Balls is pretty straightforward, and you might already have many of these ingredients in your pantry. Here’s what you’ll need for the ultimate treat:
- Peanut Butter: Creamy or chunky, it adds rich flavor and binds everything together.
- Powdered Sugar: This sweetener gives the balls their delightful sweetness and texture.
- Butter: For that creamy consistency, you’ll want to use softened butter.
- Crushed Butterfinger Candies: The star of the show! Farm-fresh, store-bought—just make sure they’re crunchy and full of flavor.
- Chocolate Melts or Coating: This gives your butterfinger balls that oh-so-satisfying outer layer.
Optional Add-Ins and Toppings
Want to elevate your butterfinger balls recipe? Consider these fun add-ins:
- Nuts: Chopped almonds or pecans can add a delightful crunch.
- A Pinch of Sea Salt: This balances the sweetness and enhances the flavor profile.
- Sprinkles: Who doesn’t love a little color? Fun for kids and adults alike!
Feel free to experiment! This is your recipe canvas—check out Baker’s Corner for inspiration and tips on creative twists. Enjoy the process!
Step-by-step preparation of Butterfinger Balls
Making Butterfinger Balls is not just about having a delicious treat; it’s a simple process that can elevate your snack game in no time. With this step-by-step guide, you’ll find that this Butterfinger balls recipe is perfect for a quick afternoon treat or a delightful surprise for friends. Let’s dive into the preparation!
Gather your ingredients
First things first: you’ll want to gather all your ingredients for these delectable treats. Having everything prepped before you start cooking can make the process smooth and enjoyable. Here’s what you need:
- 2 cups of crushed Butterfinger bars (about 5 standard-sized bars)
- 1 cup of creamy peanut butter
- 2 cups of chocolate chips (milk or semi-sweet)
- A pinch of salt (optional, but it helps enhance flavors)
- Sprinkles or crushed nuts for decoration (optional)
You can usually find these ingredients at your local grocery store or, for convenience, order them online from retailers like Amazon.
Crush the Butterfinger bars
Once your ingredients are gathered, it’s time to take that big step: crushing the Butterfinger bars! You can go about this in a couple of ways:
-
The easy way: Place the bars in a zip-lock bag and use a rolling pin to crush them into fine pieces. This also serves as a perfect outlet for some stress relief!
-
The thorough way: If you have a food processor, toss the bars in and pulse until you achieve a crumbly texture.
You want the pieces to be small but not entirely powdered; a bit of crunchiness adds texture to your Butterfinger balls.
Mix with creamy peanut butter
Now for the most fun part—combining flavors. In a large mixing bowl, add your crushed Butterfinger bars and pour in the creamy peanut butter. The key here is to mix until well combined. You’re looking for a dough-like consistency that you can easily form into balls. Use a sturdy spatula or your hands—don’t be afraid to get a little messy!
If the mixture seems too crumbly, consider adding a little more peanut butter or a splash of honey to bring it all together.
Form the balls
With your mixture ready, it’s time to shape it into balls. Use a tablespoon or a small scoop to portion out the mixture, and then roll it between your hands to form neat, round balls. Aim for about 1 inch in diameter for the perfect bite-sized treat. Place each ball on a baking sheet lined with parchment paper to prevent sticking.
This is also a great time to invite a friend over for some fun teamwork—making Butterfinger balls could be your new go-to activity!
Melt chocolate and coat the balls
While your balls set in the freezer for about 15 minutes, you can start melting the chocolate. You have a couple of options for melting the chocolate chips:
-
Microwave method: Place the chips in a microwave-safe bowl, heating in 30-second intervals, stirring in between until smooth.
-
Double boiler method: If you have more time or prefer a gentler heating method, melt the chocolate using a double boiler on the stovetop.
Once melted, dip each Butterfinger ball into the chocolate, using a fork to lift it out and let the excess chocolate drip off before placing it back on the parchment paper. Feel free to sprinkle toppings at this stage!
Chill to set
Finally, to finish off your Butterfinger balls, place them back in the refrigerator for about 30 minutes to an hour to let the chocolate set. The longer you let them chill, the firmer they become, making them easier to handle.
And there you have it! Following this Butterfinger balls recipe step-by-step will ensure that you produce a batch of scrumptious treats faster than you can say “delicious.” Enjoy them yourself, or share with friends—the choice is yours!
Curious about other variations of this recipe? Check out related treats like peanut butter truffles or chocolate-coated snacks. Happy snacking!

Variations of Butterfinger Balls
When diving into the world of Butterfinger balls, there are so many creative ways to tailor this delightful treat to suit different tastes! Let’s explore a few variations you can easily whip up!
Indulgent Peanut Butter Chocolate Drizzle
Want to take your Butterfinger balls to the next level? Drizzle some melted chocolate mixed with creamy peanut butter over your chilled balls! Not only does this add a decadent touch, but it also enhances that irresistible peanut buttery flavor. You can use dark, milk, or even white chocolate—whatever tickles your fancy! Just melt the chocolate, mix in a couple of tablespoons of peanut butter, drizzle it over the balls, and let it set. Talk about a flavor explosion!
Almond Butter Alternative
If you’re looking for a slightly different spin, try swapping peanut butter for almond butter in your Butterfinger balls recipe. Almond butter gives the balls a distinctive flavor and provides a little extra nutrition, with healthy fats and proteins. Simply follow your standard recipe, making this simple replacement. It’s an excellent choice if you’re nut-sensitive or simply want to experiment with flavors.
Vegan Butterfinger Balls
For those following a plant-based lifestyle, you’ll be happy to know that you can make vegan Butterfinger balls! Substitute the standard ingredients with vegan-friendly options. Use almond or peanut butter without added sugar, and choose dairy-free chocolate. For the binding agent, try using maple syrup or agave nectar. This way, you get all the delight of Butterfinger balls without compromising your values. The best part? You can still enjoy that satisfying crunch and creamy taste!
No matter which variation you choose, these Butterfinger balls are sure to impress at your next gathering. They’re quick, easy, and, most importantly, delicious! For more tips on creating delightful treats, you can check out sources like The Kitchn or Serious Eats.
Cooking Tips and Notes for Butterfinger Balls
Achieving the Perfect Texture
When following your Butterfinger balls recipe, the texture is key to achieving that delightful crunch. Start with finely crushed Butterfinger bars — the smaller the pieces, the smoother the mixture. If you find that the mixture is too crumbly, adding a touch more peanut butter can help bind everything together. Just remember, you want a balance between sticking and rolling easily into balls!
Storing Your Butterfinger Balls
Proper storage ensures your tasty treats stay fresh. To keep your Butterfinger balls at their best, store them in an airtight container in the fridge. They can last up to a week — but honestly, you might find they vanish long before then! If you’re planning to make a big batch, consider freezing them. Just wrap in plastic wrap and then in aluminum foil for optimal freshness. When you’re ready to enjoy, let them thaw on the counter or pop them in the fridge for a bit.
Looking for more insights? Check out Simply Recipes for great tips on ingredient storage.
Serving suggestions for Butterfinger Balls
Perfect for parties and gatherings
These Butterfinger Balls are a crowd pleaser, perfect for any social event! Whether you’re hosting a game night, a potluck, or just a casual get-together, these sweet treats are sure to impress. Their bite-sized nature makes them easy to share, and their rich flavor will have your guests coming back for more. Want to elevate your presentation? Try serving them on a decorative platter or in cute, individual cupcake liners for that extra touch. You can even sprinkle some crushed Butterfinger on top for added flair.
Pairing ideas with beverages
Thinking about what to sip alongside your Butterfinger Balls? Consider going the non-alcoholic route with delicious alternatives! A creamy vanilla milkshake complements the chocolate and peanut butter flavor beautifully. If you prefer something lighter, a refreshing sparkling apple cider can balance the richness of these treats. For tea enthusiasts, a chai tea latte offers a wonderful contrast, bringing warmth and spice to your dessert experience.
Explore more on pairing desserts with drinks here, where you’ll find expert tips and suggestions that will elevate your entertaining game!
Time Breakdown for Butterfinger Balls
When you’re looking to whip up a delightful treat, knowing the timing can make all the difference! Here’s a quick breakdown for the Butterfinger Balls recipe so you can plan your baking journey effectively.
Preparation Time
The prep time for this recipe is about 15 minutes. It’s as easy as mixing crushed Butterfinger candies with cream cheese. You won’t believe how fast it comes together!
Chilling Time
Once you’ve formed your balls, they need a little chill time—about 30 minutes in the fridge. This step is crucial for achieving that perfect texture.
Total Time
In total, your Butterfinger Balls will take around 45 minutes from start to finish. Quick enough for a last-minute treat but delicious enough to impress!
If you want more dessert inspiration, check out this great guide on no-bake treats for even more ideas!
Nutritional facts for Butterfinger Balls
Calories per serving
When you’re indulging in a Butterfinger balls recipe, it’s good to know what you’re consuming. Each delicious serving contains about 110 calories. This makes them a delightful treat without breaking your daily calorie bank.
Sugar content
Now, let’s talk sugar. Each Butterfinger ball features around 15 grams of sugar. While they are certainly a sweet treat, moderation is key. Pairing these with a protein-rich snack could help balance your sugar intake.
Protein content
Finally, protein lovers will find about 2 grams of protein in a serving of these tasty delights. Although it’s not a significant source of protein, these treats can still be enjoyed alongside a more substantial, high-protein snack option, like a yogurt or turkey bacon, to keep you feeling full.
For more tips on balancing sweets and healthy options, check out resources from the Mayo Clinic. Enjoy your baking!
FAQs about Butterfinger Balls
Can I use other candy bars instead of Butterfinger?
Absolutely! While the Butterfinger balls recipe shines with the unique crunchy peanut butter flavor of Butterfinger, you can easily swap in other candy bars if you prefer. Consider using Reese’s for a chocolate-peanut butter twist or Snickers for a delightful mix of chocolate and nougat. Just make sure these alternatives maintain a similar texture so your treats hold together well. Feel free to get creative!
How long do they last in the fridge?
When stored properly, your Butterfinger balls can last in the fridge for about 1-2 weeks. Keep them in an airtight container to ensure they remain fresh and delicious. However, if your household is anything like mine, they might not be around that long! It’s hard to resist these delightful bites.
Can I freeze Butterfinger balls?
Yes, you can definitely freeze Butterfinger balls! They freeze wonderfully, making them a perfect make-ahead treat. To freeze, just place them in a single layer on a baking sheet until firm, then transfer them to an airtight container or freezer bag. They can last for about 2-3 months in the freezer. When you’re ready to enjoy, just let them thaw in the fridge or at room temperature. It’s like having a secret stash of dessert waiting for you!
If you’re still curious about other storage tips or variations, check out reliable sources like The Kitchn or Food Network. Happy baking!
Conclusion on Butterfinger Balls Recipe
As we wrap up our journey through this butterfinger balls recipe, you’ll discover just how easy and rewarding it is to whip up this delicious treat. Not only are these bites perfect for satisfying your sweet tooth, but they also make for an impressive party snack or a thoughtful homemade gift.
Remember, the combination of creamy peanut butter and crunchy Butterfinger gives these balls their unmistakable flavor. Feel free to experiment with dipping chocolates or garnishes that fit your taste. While you’re at it, consider sharing the joy!
Your friends will surely appreciate the effort (and love) you put into this delightful dessert. For more fun and quick recipes, check out Food Network or AllRecipes.
PrintButterfinger Balls Recipe: The Easy, Indulgent Treat You’ll Love
Butterfinger Balls are a quick and easy treat that blend the deliciousness of chocolate and peanut butter. Perfect for snack time!
- Prep Time: 15 minutes
- Cook Time: 0 minutes
- Total Time: 30 minutes
- Yield: 24 balls 1x
- Category: Dessert
- Method: No-Bake
- Cuisine: American
- Diet: Vegetarian
Ingredients
- 1 cup crushed Butterfinger bars
- 1 cup creamy peanut butter
- 2 cups powdered sugar
- 2 cups chocolate chips
Instructions
- In a bowl, combine crushed Butterfinger bars, peanut butter, and powdered sugar until well mixed.
- Form mix into balls and place on a baking sheet.
- Melt chocolate chips in a microwave or double boiler.
- Dip each ball in melted chocolate until fully coated.
- Return to the baking sheet and refrigerate until set.
Notes
- For a crunchier texture, mix in some chopped nuts.
- Store in an airtight container for up to a week.
Nutrition
- Serving Size: 2 balls
- Calories: 120
- Sugar: 10g
- Sodium: 50mg
- Fat: 7g
- Saturated Fat: 3g
- Unsaturated Fat: 4g
- Trans Fat: 0g
- Carbohydrates: 15g
- Fiber: 1g
- Protein: 2g
- Cholesterol: 0mg
Keywords: Butterfinger, dessert, snack, chocolate, peanut butter